Electronic Tap Shoe
A tap shoe, but make it electronic
A good project I worked on a couple years ago was my Electronic Tap Shoe. I have been an avid dancer from a young age so when I started learning how to process digital signals and add audio effects, I immediately thought about how I could combo up my dance and technical skills.
I did some preliminary projects processing wavetable inputs to add audio filters and trigger audio given certain sensor states to get familar with the Bela platform and figure out what sensors could work with the idea. I settled on using standard FSRs for triggering the audio and bought the cheapest pair of trainers from Sainsbury’s that I could find.
Note: this project was done during COVID so a big shoutout to my dad for teaching me how to solder in my parents dining room.
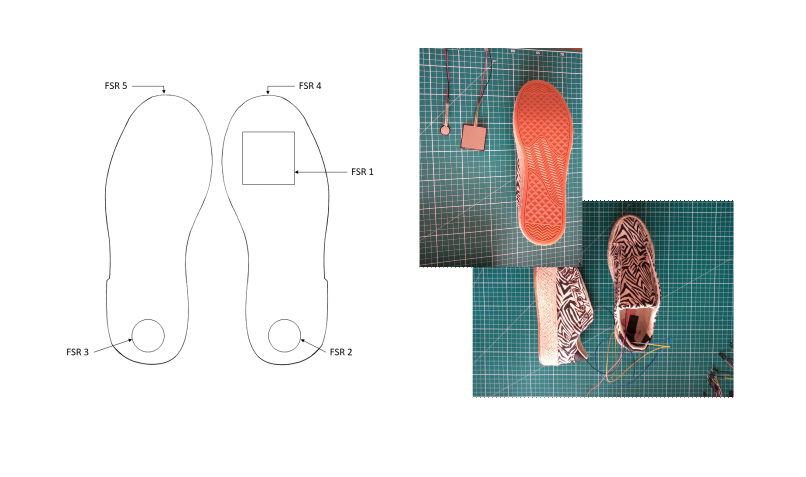
I ended up placing five sensors across the two shoes. One on each toe, one on each heel and one on the ball of the right foot (see picture below). I left the left without a corresponding sensor on the bottom of the shoe so that I could stand comfortably without triggering any sound.
Ok, so all the sensors are in place. Up next: audio!
The Audio Part
All the code for the audio generation, filters and effects were all coded by me using the Bela platform and written in C++.
For the audio output, I decided I wanted two different modes: drums and tones. For the drums, each sensor would trigger a different drum sound - kick, snare, toms and hithat. Each of these were synthesised from scratch using a simple wave and/or noise input with an altered envelope and varying filters to replicate the desired sound. For exmaple, for the hithat, I generated some white noise, made the envelope sharp and quick and then ran the sound through a high pass filter. Sweet, that’s a quick explanation of the drums. I sped through this section because the tones are where the audio gets cool and a bit more experimentative.
To create the tones, we start with a wavetable input and users choice of wave from sawtooth and sine wave. Switching between the tones and adding any audio effects could be done using Bela’s default GUI. (I did try to make my own interface, it looked nice, but ultimately I was trying to re-invent the wheel and just went back to the default choice). In the GUI, the tone’s attack, delay and release envelope parameters were all changeable - sustain had to remain at zero however to prevent the tone continuing on indefinitely.
I offered a few filtering/effect options to add on top of the tones as well. The first was a simple low pass filter, the second was distortion and the last was reverb. The low pass filter was straight forward and allowed for change for the envelope, filter sensitivity and resonance.
Distortion
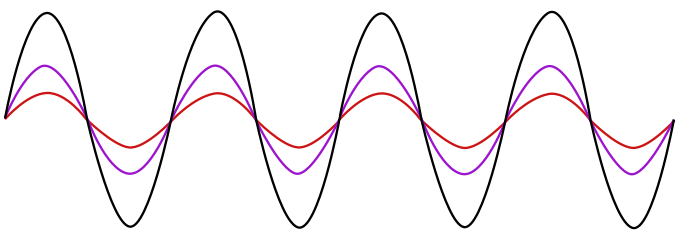
With the basic sound generation in place, I looked at adding some extra effects. The first and most straightforward (in my opinion) of these was distortion. I implemented three different distortion effects because I had the time and I felt like giving myself more work. These ended up being hard clipping, exponential soft clipping and full wave rectifier distortions which are defined by:
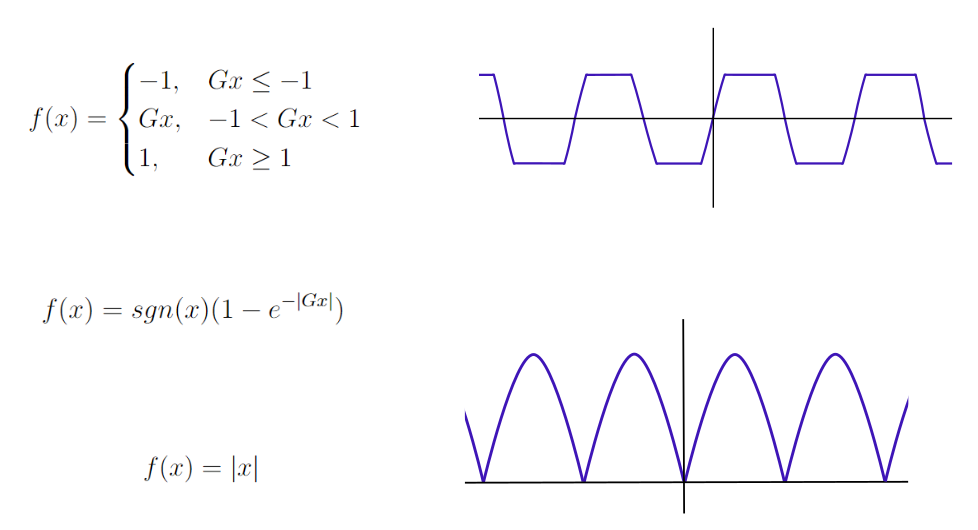
These effects could be implemented using a simple slider on the GUI by taking on values on 0, 1, 2, or 3 - 0 being no distortion, 1 being hard clipping, 2 being exponential softclipping and then 3 being the full wave recifier. The selected value would then trigger some conditional statements to run the audio samples through the respective equation and output the distorted (or undistorted) sample.
Reverb
(Maths equations to follow).
Not a bug, but a feature
Blog post to be continued…